Using MissionControl#
MissionControl is a graphical Controller for Constellation. This tutorial demonstrates how to use MissionControl to control multiple satellites, including initialization and taking data.
See also
It is recommend to read through the tutorial on how to start and control a single satellite first.
Starting MissionControl#
MissionControl is started using the MissionControl command or by searching for it in the application overview if
installed system-wide. On startup, the group name of the Constellation which should be controlled needs to be provided.
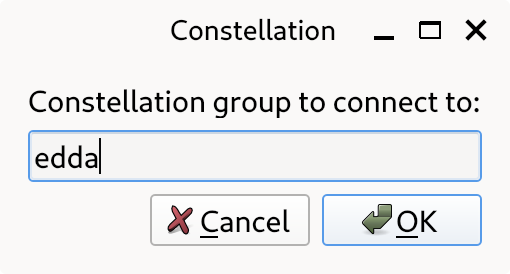
MissionControl startup window#
Hint
Alternatively, MissionControl can be started with a group directly using the -g GROUP command line argument.
The main window of MissionControl can be divided into three parts:
Information about the entire Constellation on top
A section for controlling the entire Constellation
A list of all connected satellites
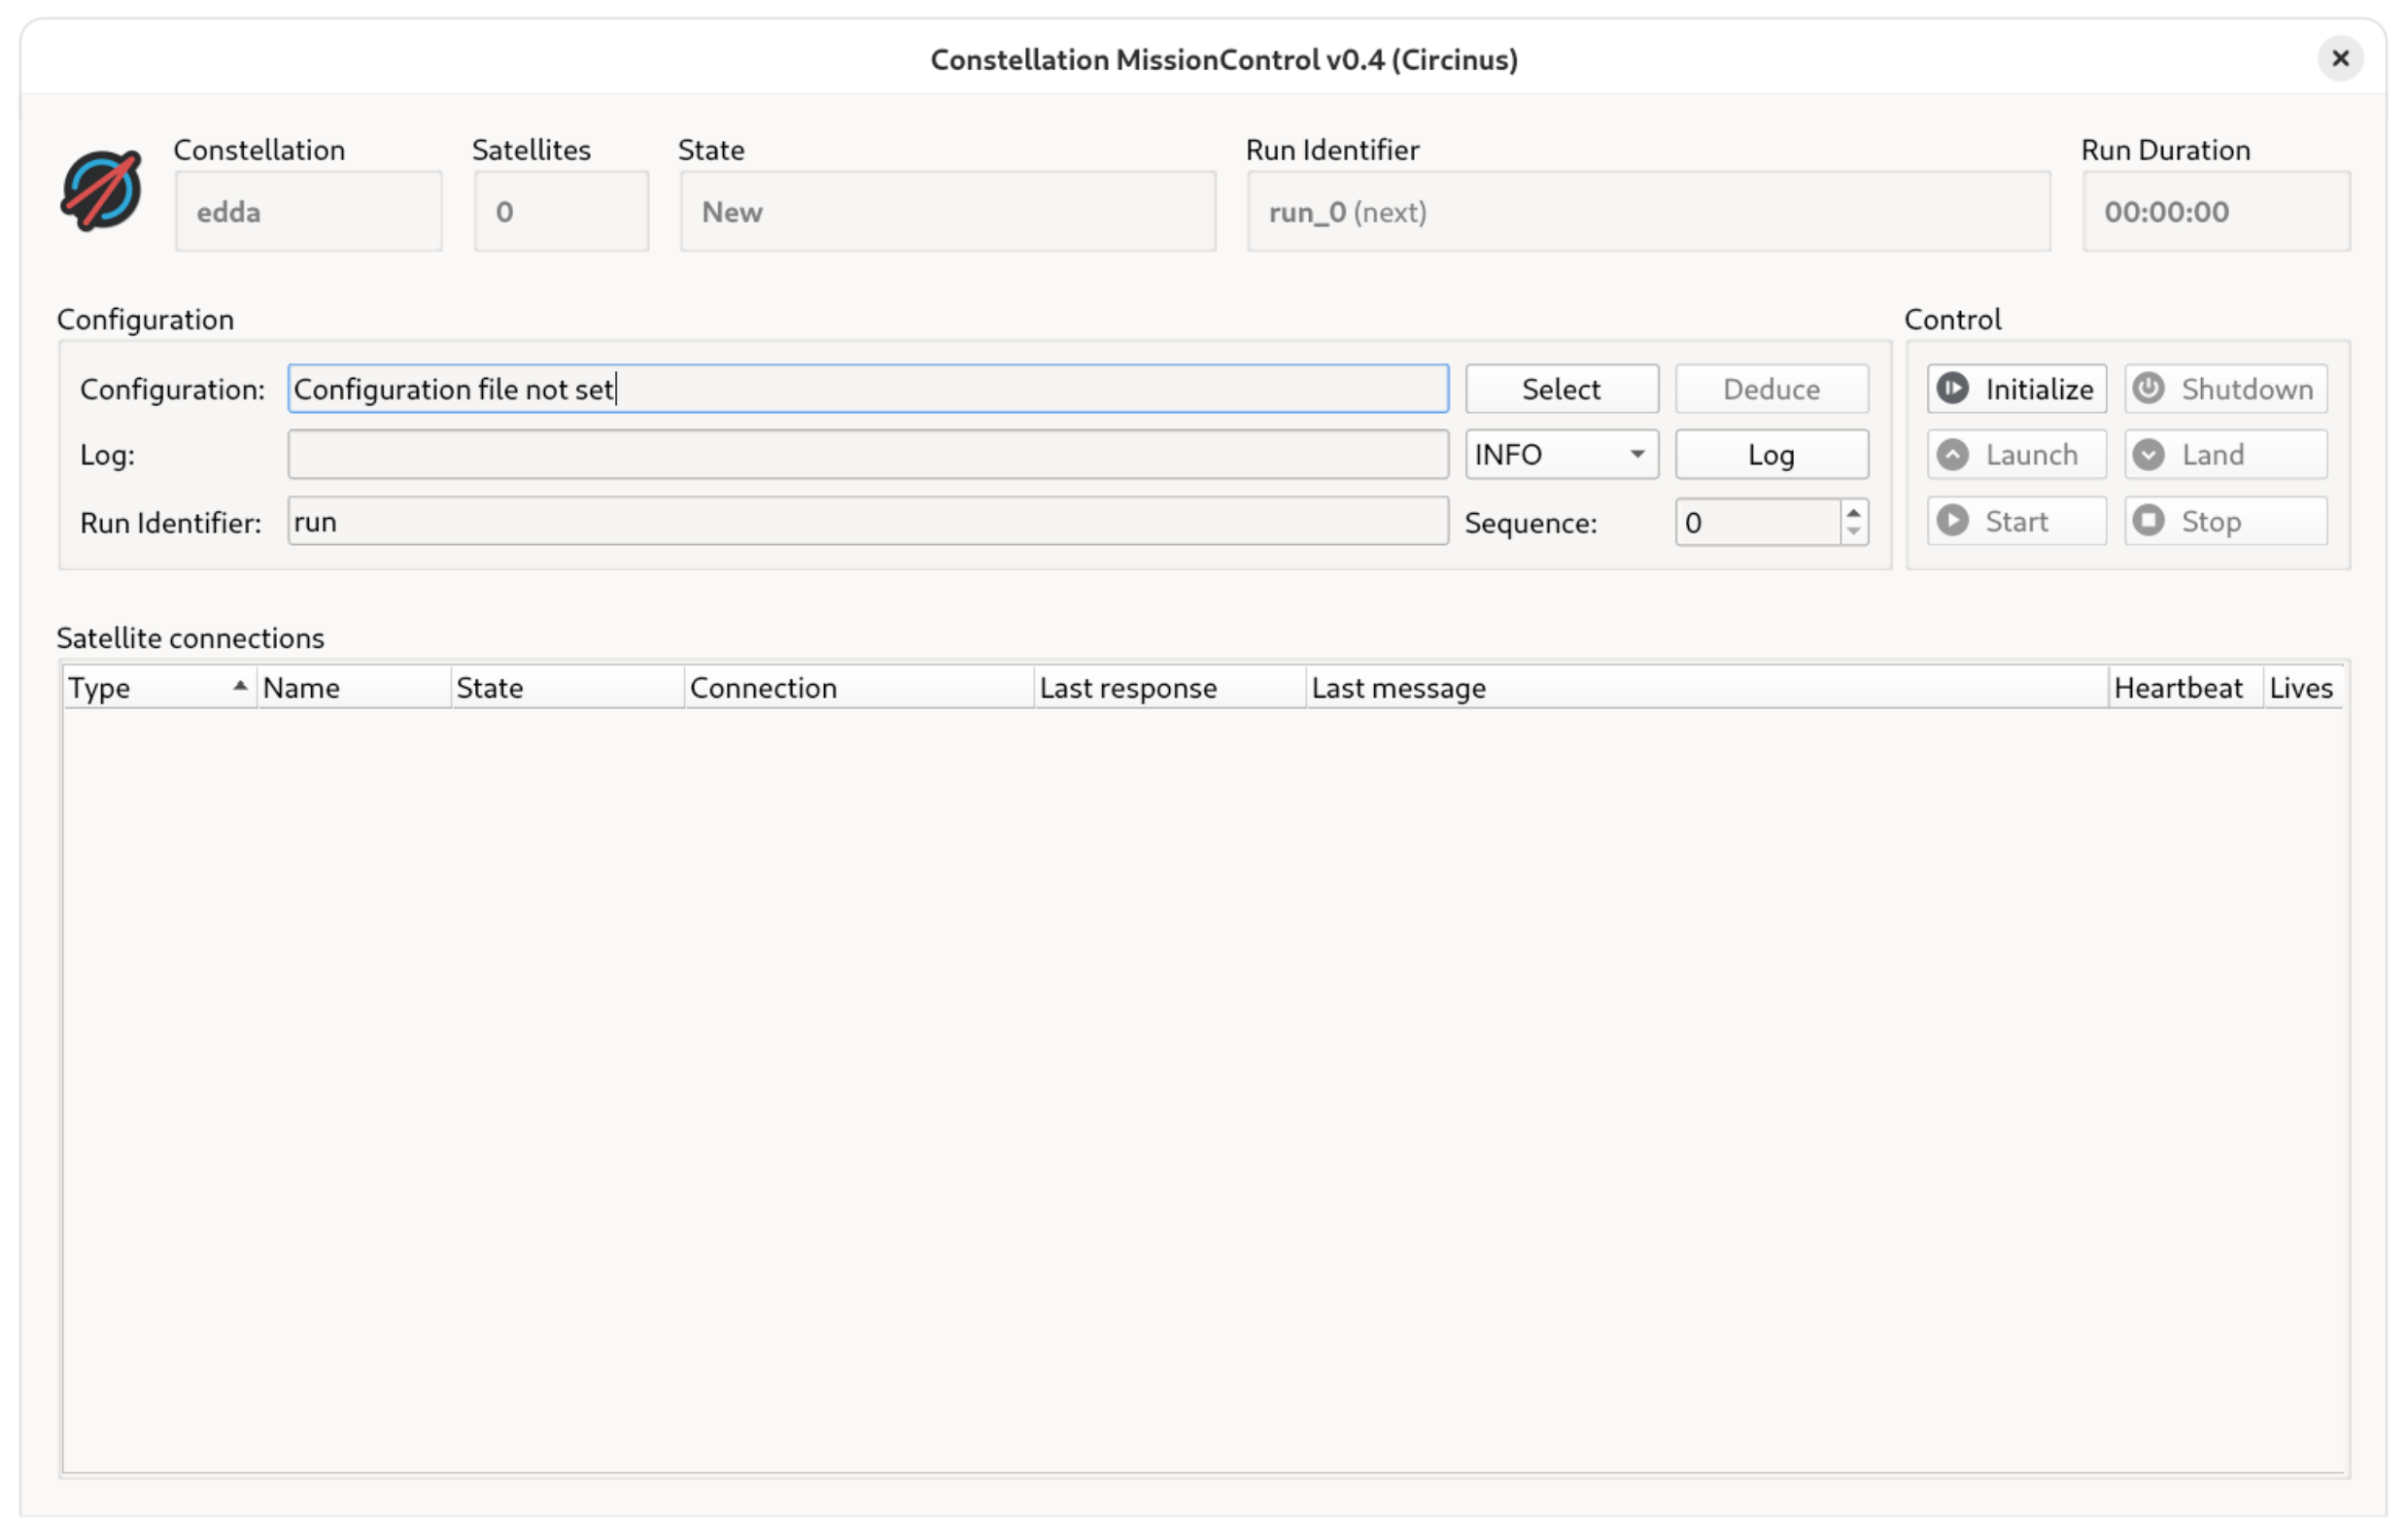
MissionControl main window without satellites#
Initializing the Constellation#
In order to control satellites, some satellites need to be started as part of the same group. In this tutorial,
three Sputnik satellites named One, Two and Three, a RandomTransmitter named Sender and a EudaqNativeWriter
named Receiver are started.
Note
MissionControl does not start satellites. The five satellites required for this tutorial need to be started in a terminal as shown in the tutorial for a single satellite.
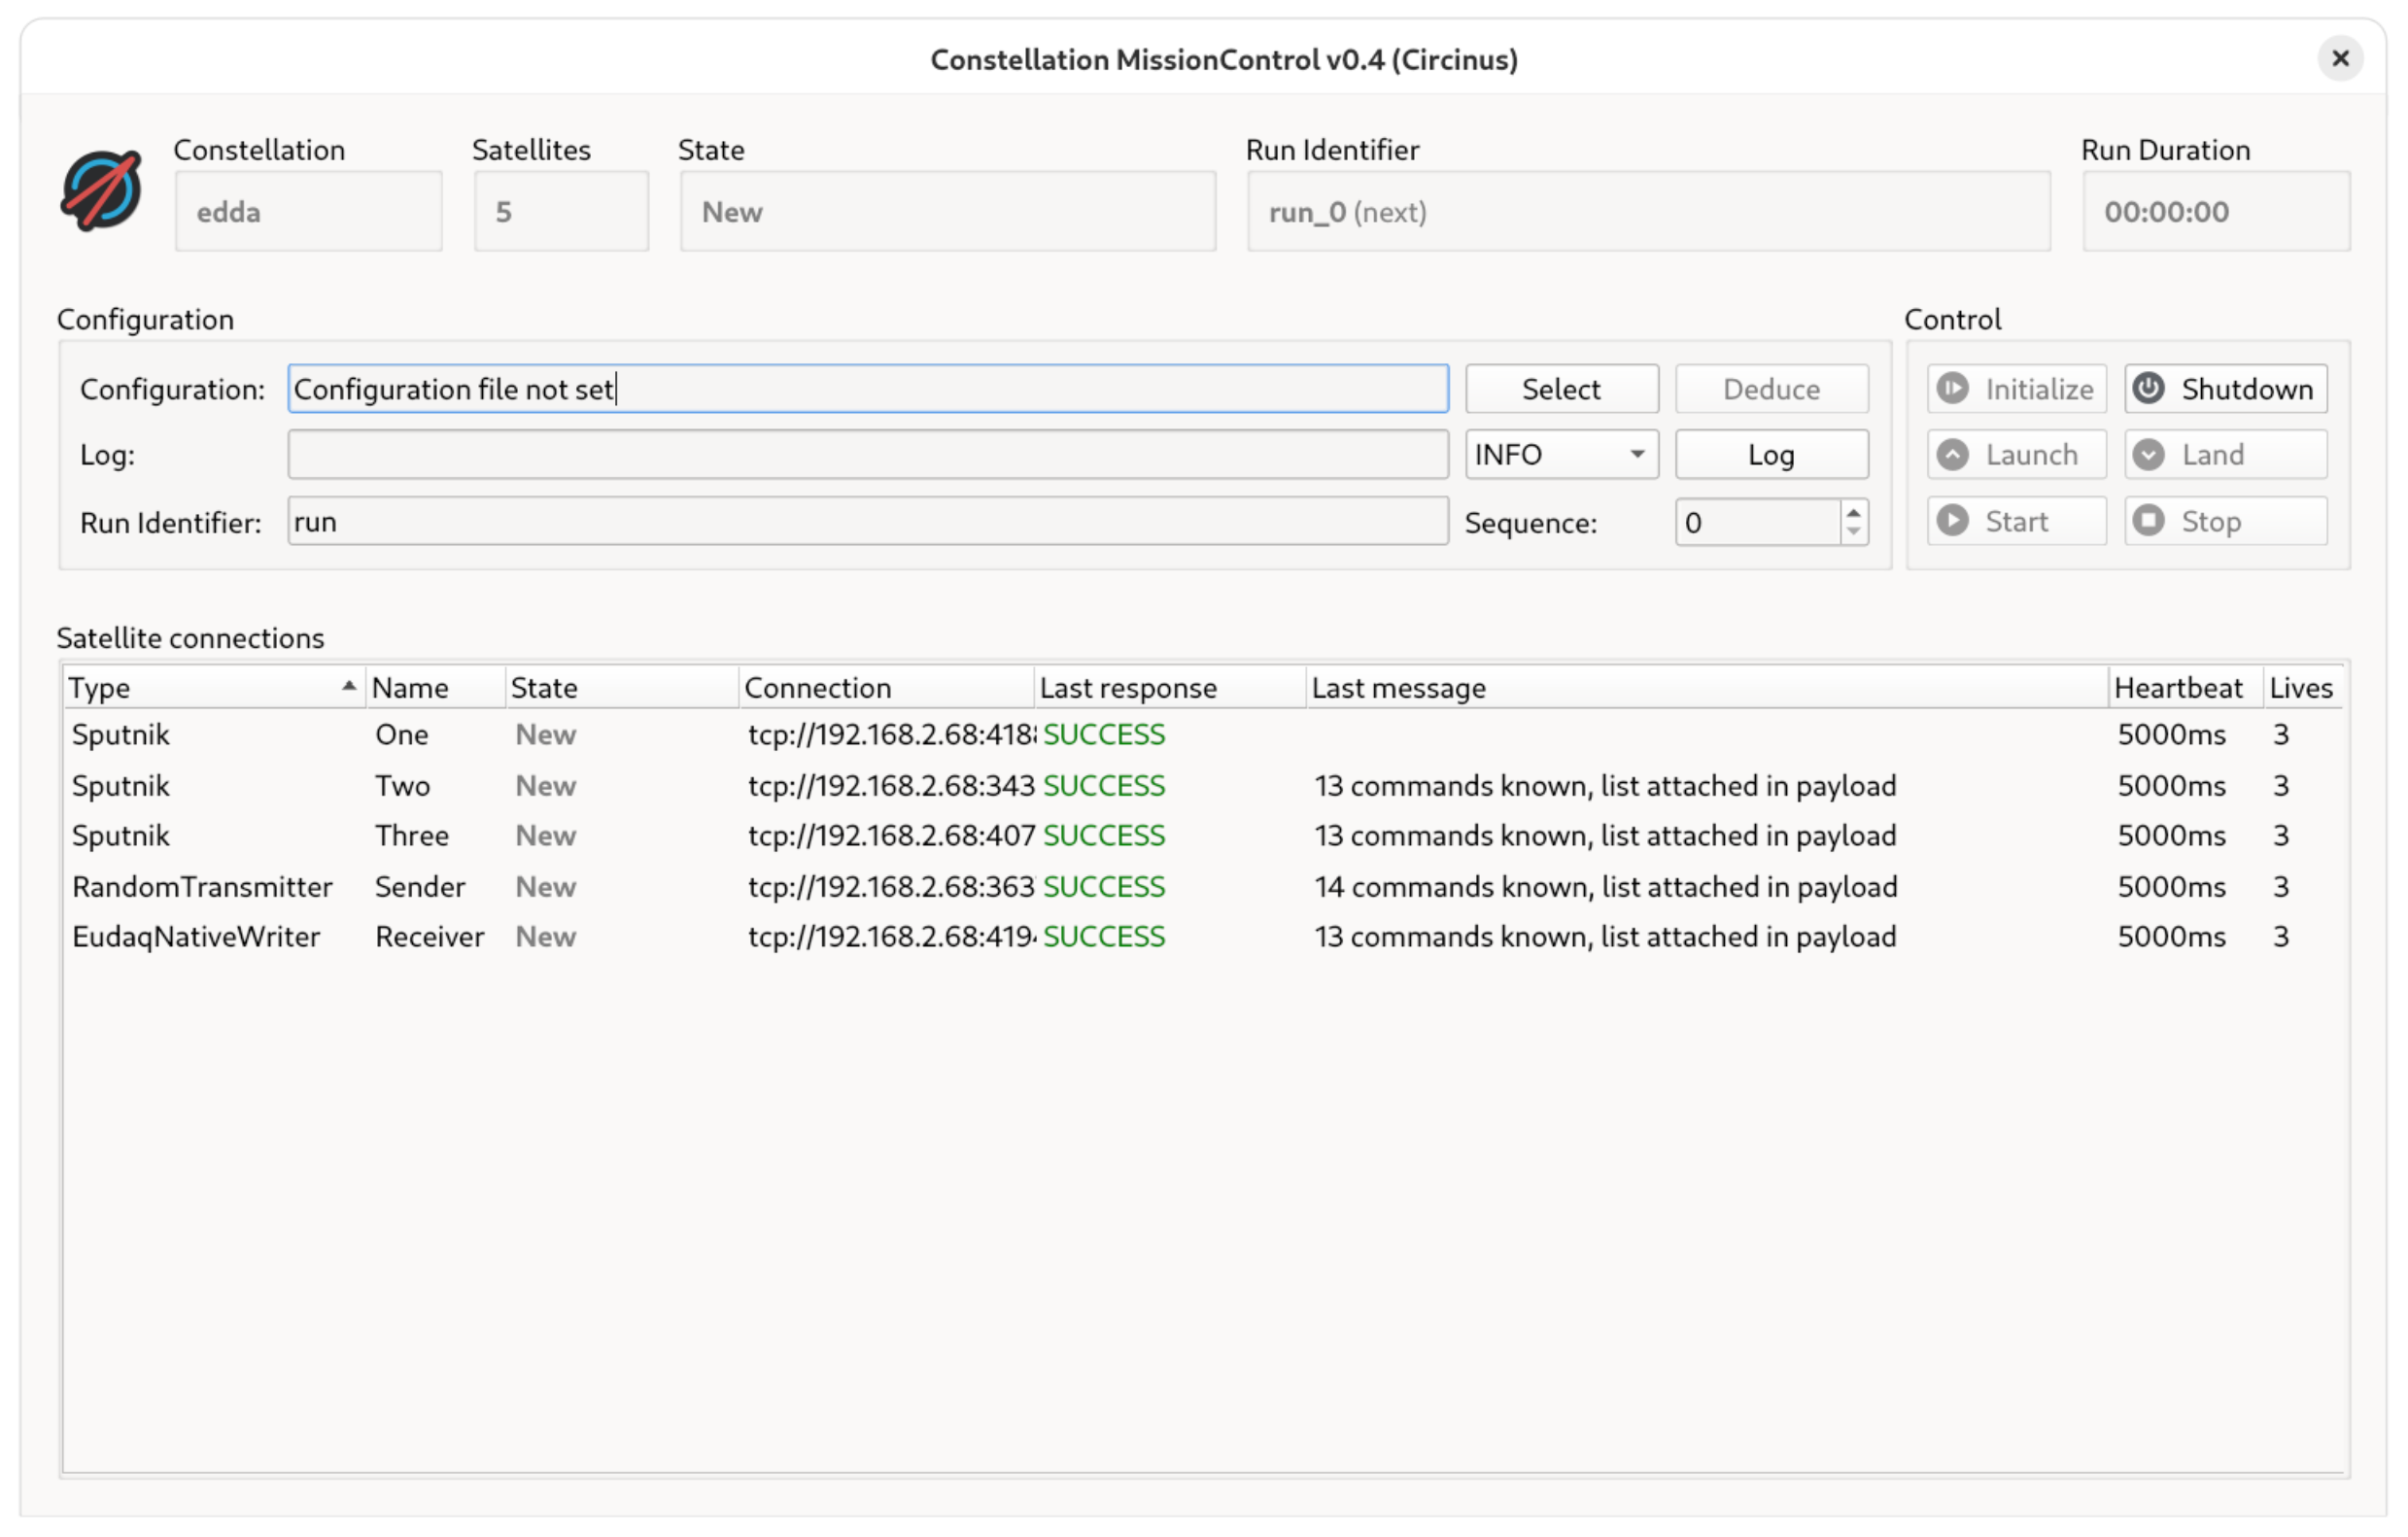
MissionControl main window with satellites in NEW state#
To initialize the satellites, the following configuration file is used:
[Sputnik._default]
interval = 3000

[Sputnik.One]
interval = 2500

[Sputnik.Two]

[RandomTransmitter.Sender]

[EudaqNativeWriter.Receiver]
_data.receive_from = ["Sender"]
output_directory = "/tmp/test"
Important
Make sure to create the output directory for the EudaqNativeWriter.
The configuration file can be selected with the Select button. Then, the satellites can be initialized using
the Initialize button. Once the button is clicked, a warning will appear that Sputnik.Three is not mentioned
explicitly in the configuration - this is a measure to prevent typing errors in configuration files. However in this case,
the initialization can be continued by clicking Ok.
Hint
Any satellites not explicitly mentioned will still be initialized. The configuration is generated from the global level
and from the type specific level, e.g. [Sputnik._default]. If these do not exist, an empty configuration is sent.
After the initializing, all satellites besides the EudaqNativeWriter are now in the INIT state. The
initialization for the EudaqNativeWriter satellite failed, which resulted in the satellite being in the
ERROR state.
Before moving on to rectifying this issue, it is worth taking a look at the top part of the window. Besides the information about the group and number of connected satellites, there is also a state information. This includes the lowest state of all satellites. If the state is “mixed”, meaning that not all satellites have the same state, the lowest state is followed by “≊”.
See also
More details on the Constellation finite state machine and its different states and transitions can be found in the satellite chapter.
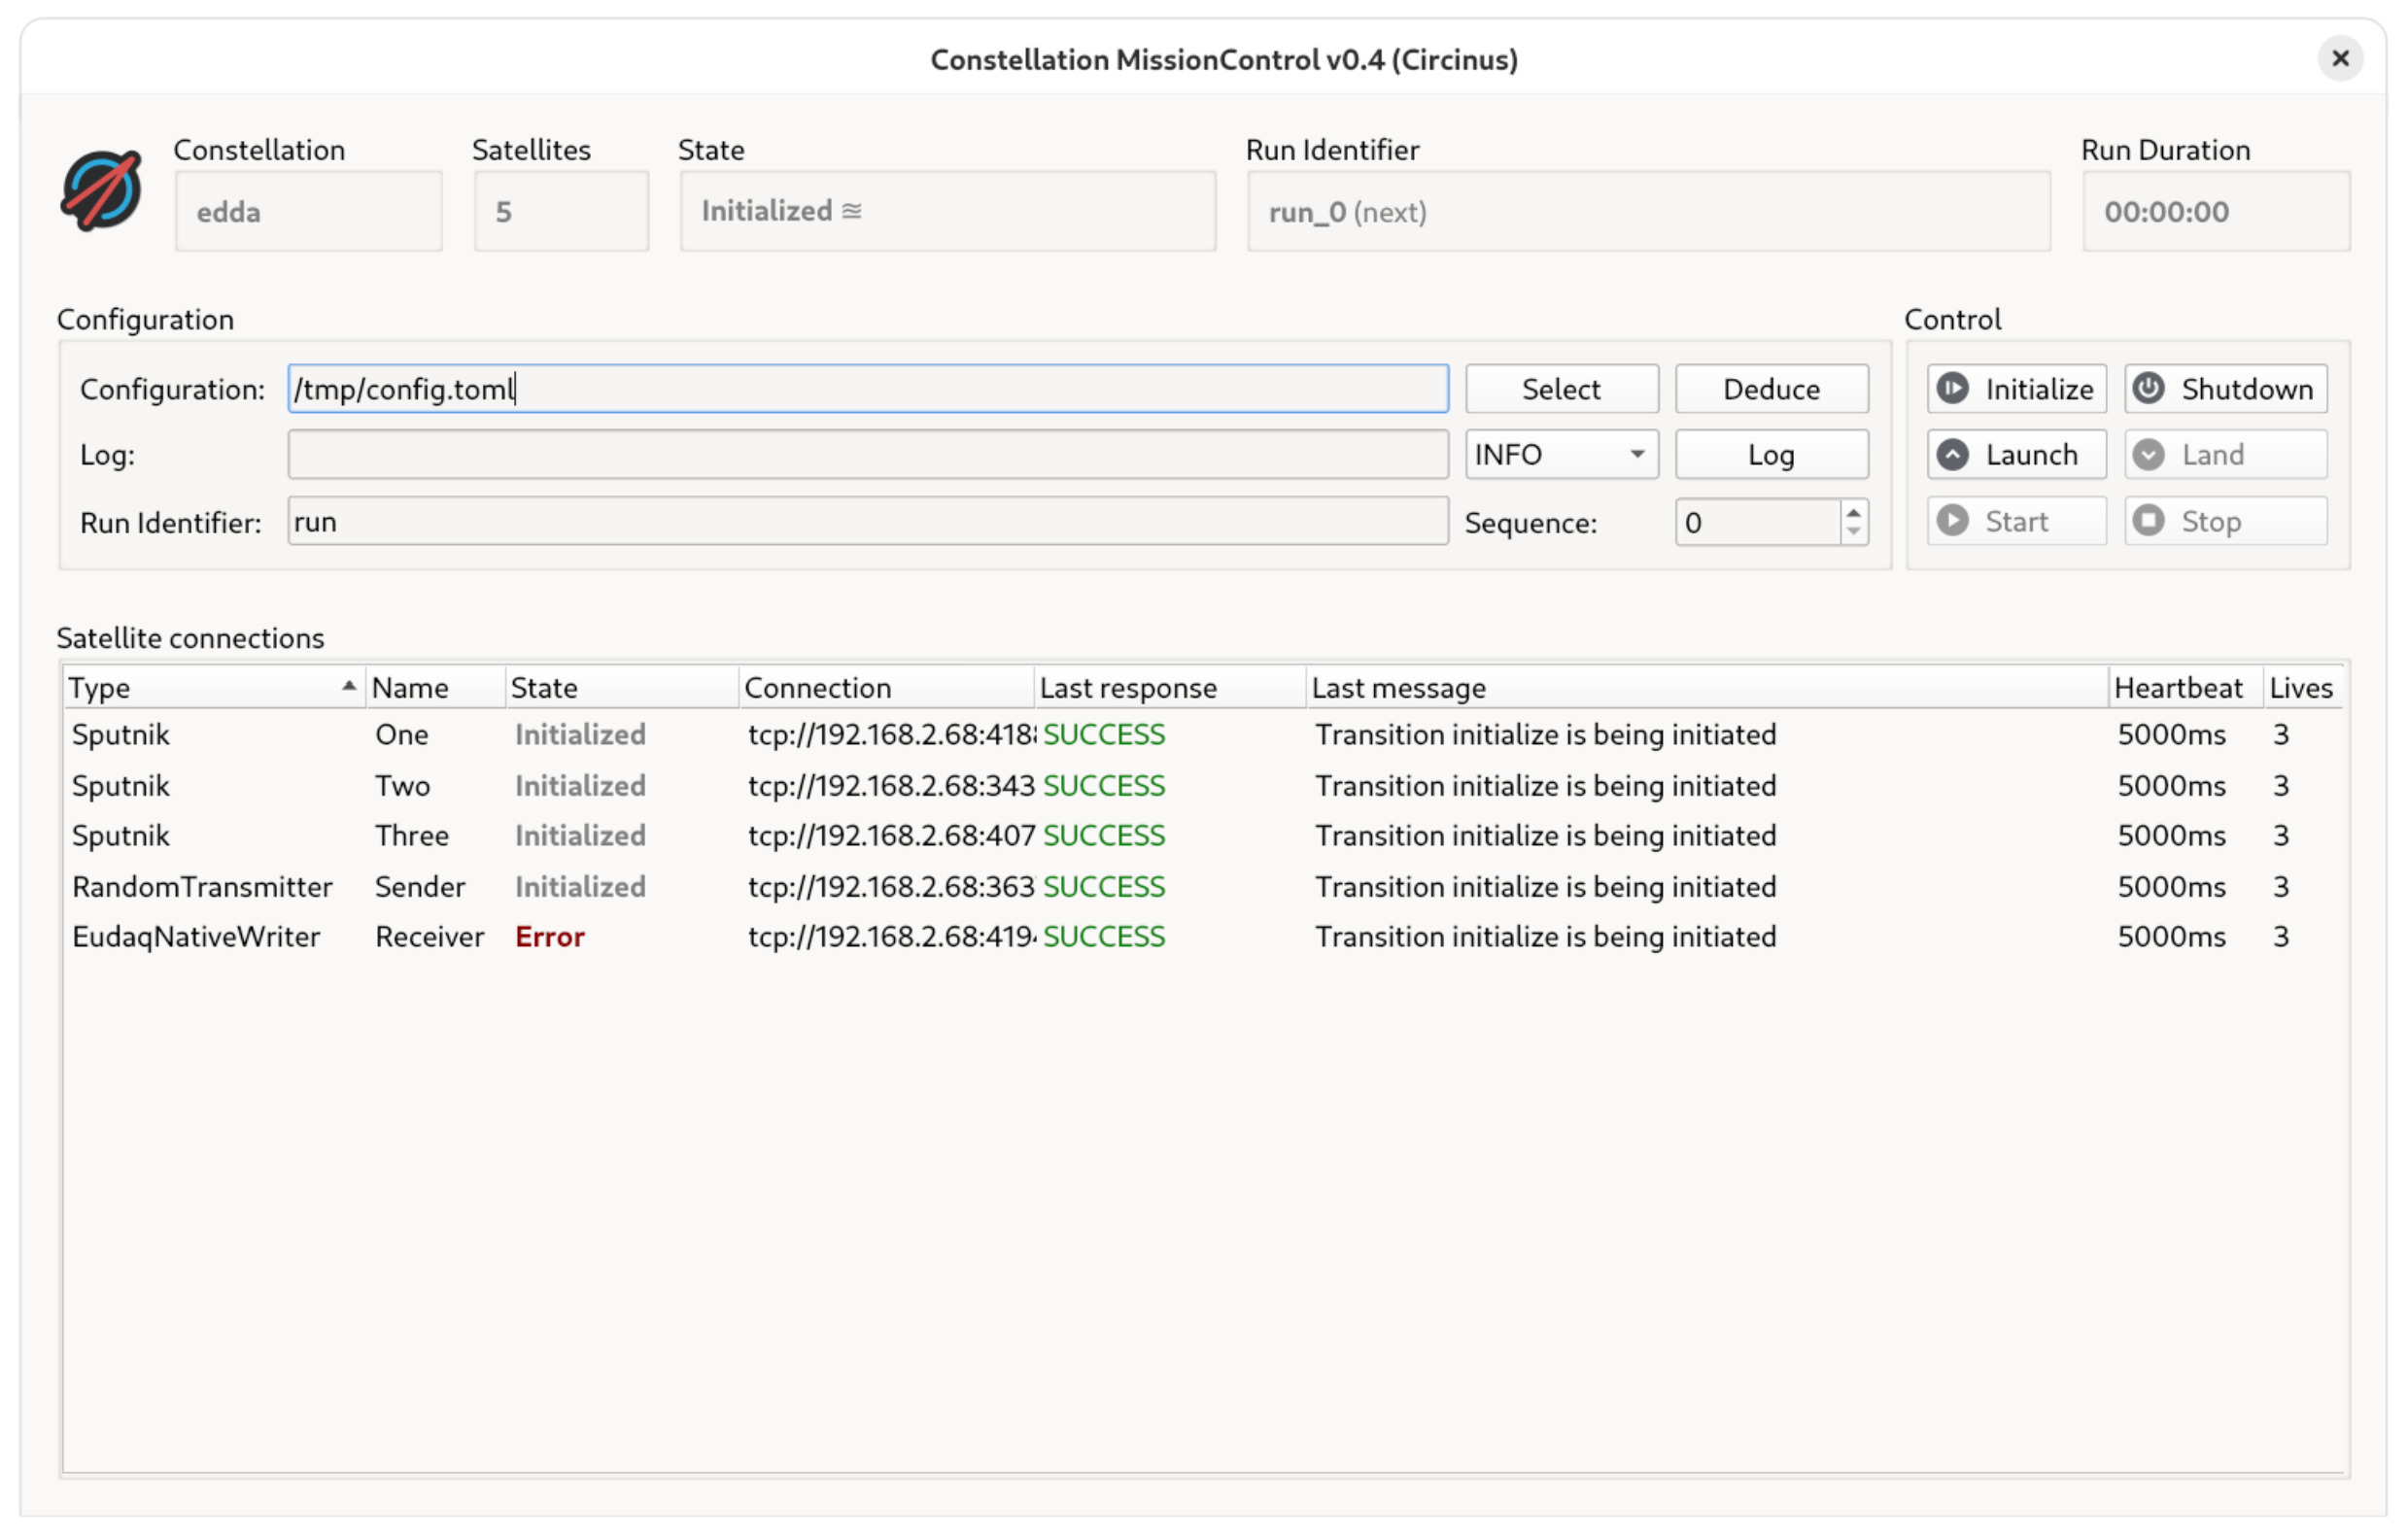
MissionControl main window after first initialization#
The reason why the initialization of the EudaqNativeWriter failed becomes clear after checking its status, which is shown
in the “Last message” column of the satellites list, or its log messages either via the console output or a logging user
interface:
Error
Critical failure: Value of key _data.receive_from is not valid: Sender is not a valid canonical name
The _data.receive_from configuration parameter should contain the canonical names of all satellites from which the receiver
should receive data. The canonical name is SATELLITE_TYPE.SATELLITE_NAME, which in this case corresponds to
RandomTransmitter.Sender. In order to correct this and allow a successful initialization, the file should be adapted as follows:
[Sputnik._default]
interval = 3000

[Sputnik.One]
interval = 2500

[Sputnik.Two]

[Sputnik.Three]

[RandomTransmitter.Sender]

[EudaqNativeWriter.Receiver]
_data.receive_from = ["RandomTransmitter.Sender"]
output_directory = "/tmp/test"
Hint
MissionControl parses the file anew every time the configuration is requested - it is thus not required to select or reload the same configuration file again.
With the amended configuration, all satellites can be initialized properly by clicking Initialize again.
Tip
Instead of initializing all satellites, it also possible to just initialize the particular satellite which went to ERROR state. More details on controlling single satellites are provided later in this tutorial in the section Controlling Individual Satellites.
Recording Data#
The next step is to start recording data. In order to do this, the satellites first need to be launched to the ORBIT state. In this state, the configuration send during the initialization is fully applied such that the satellites are ready for immediate data taking. The satellites can be launched by clicking the Launch button.
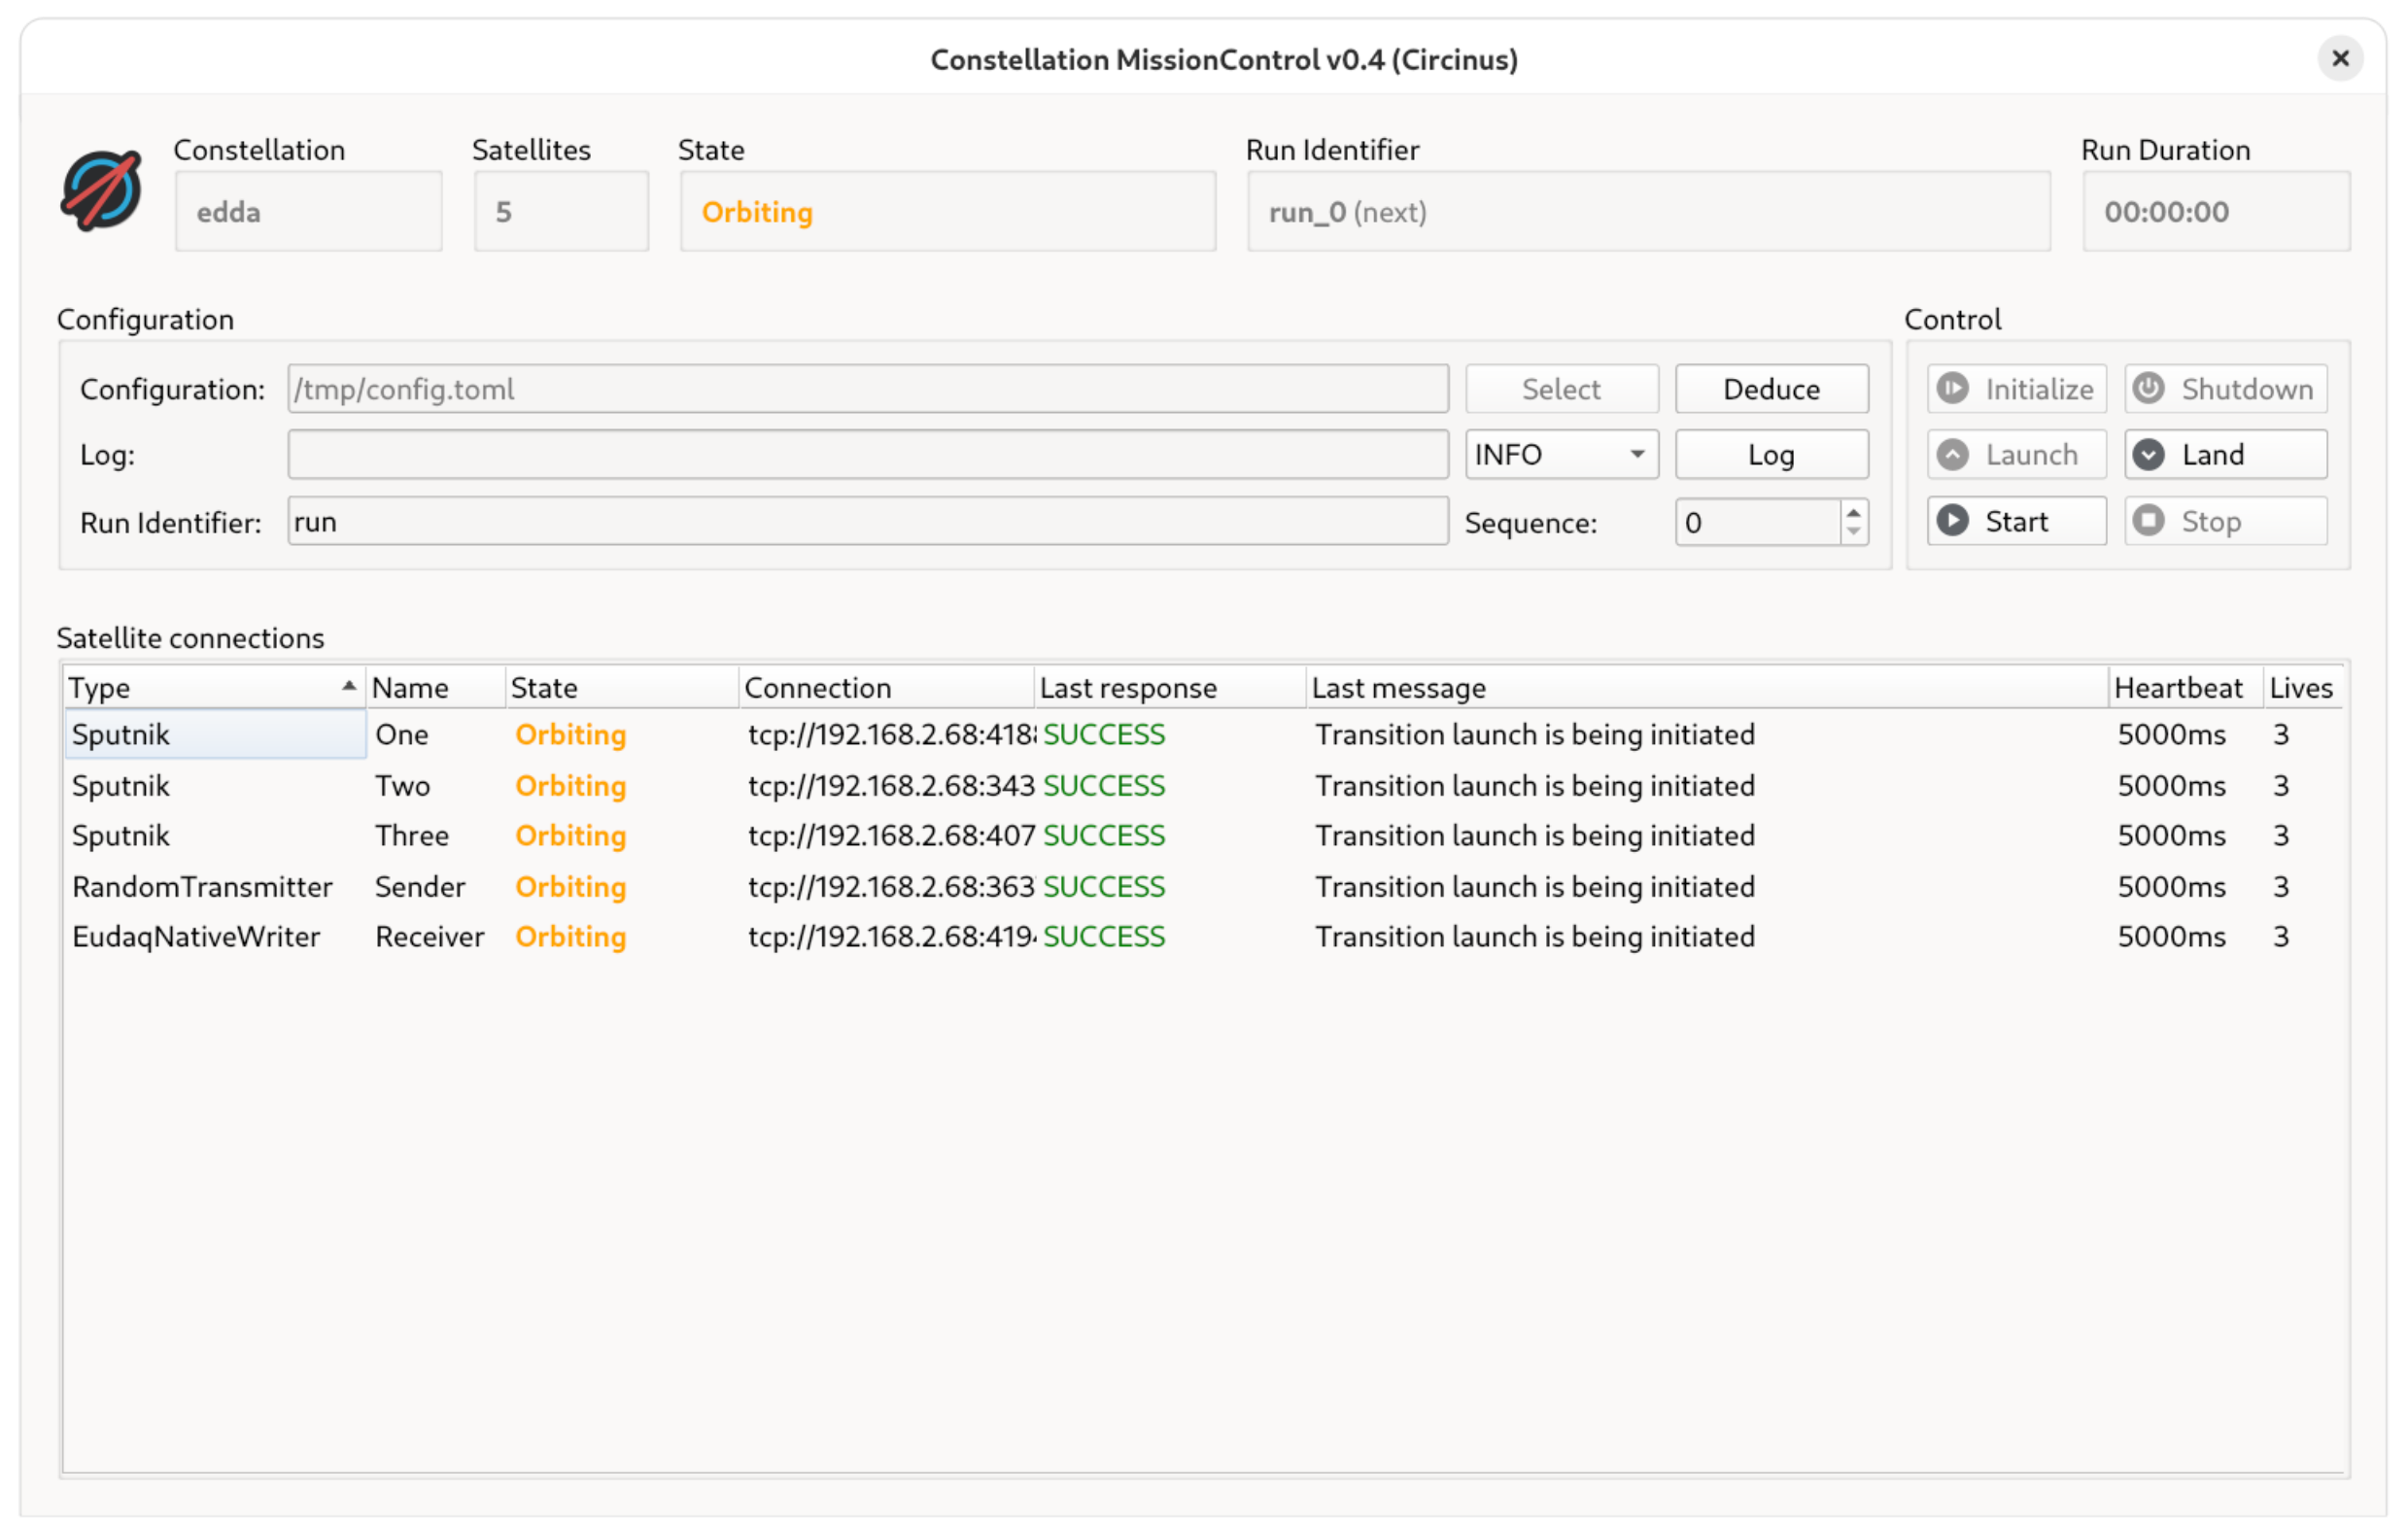
MissionControl main window after launching#
Data taking is organized in “runs”: when data taking is started, a new run begins, and a run ends when data taking is stopped. In Constellation, each run has a run identifier, a free-form string identifying this particular measurement. In MissionControl, this run identifier is composed of two parts: a free-text identifier which can be provided in the control section of the MissionControl window, and a run sequence counter which can be found next to the run identifier field. This sequence number is automatically incremented every time a run ended. In the top right of the MissionControl window, the current or next run identifier is shown.
See also
More information on Constellation data concepts, runs and their properties can be found in the Data Processing section of this guide.
A new run can be started by clicking the Start button.
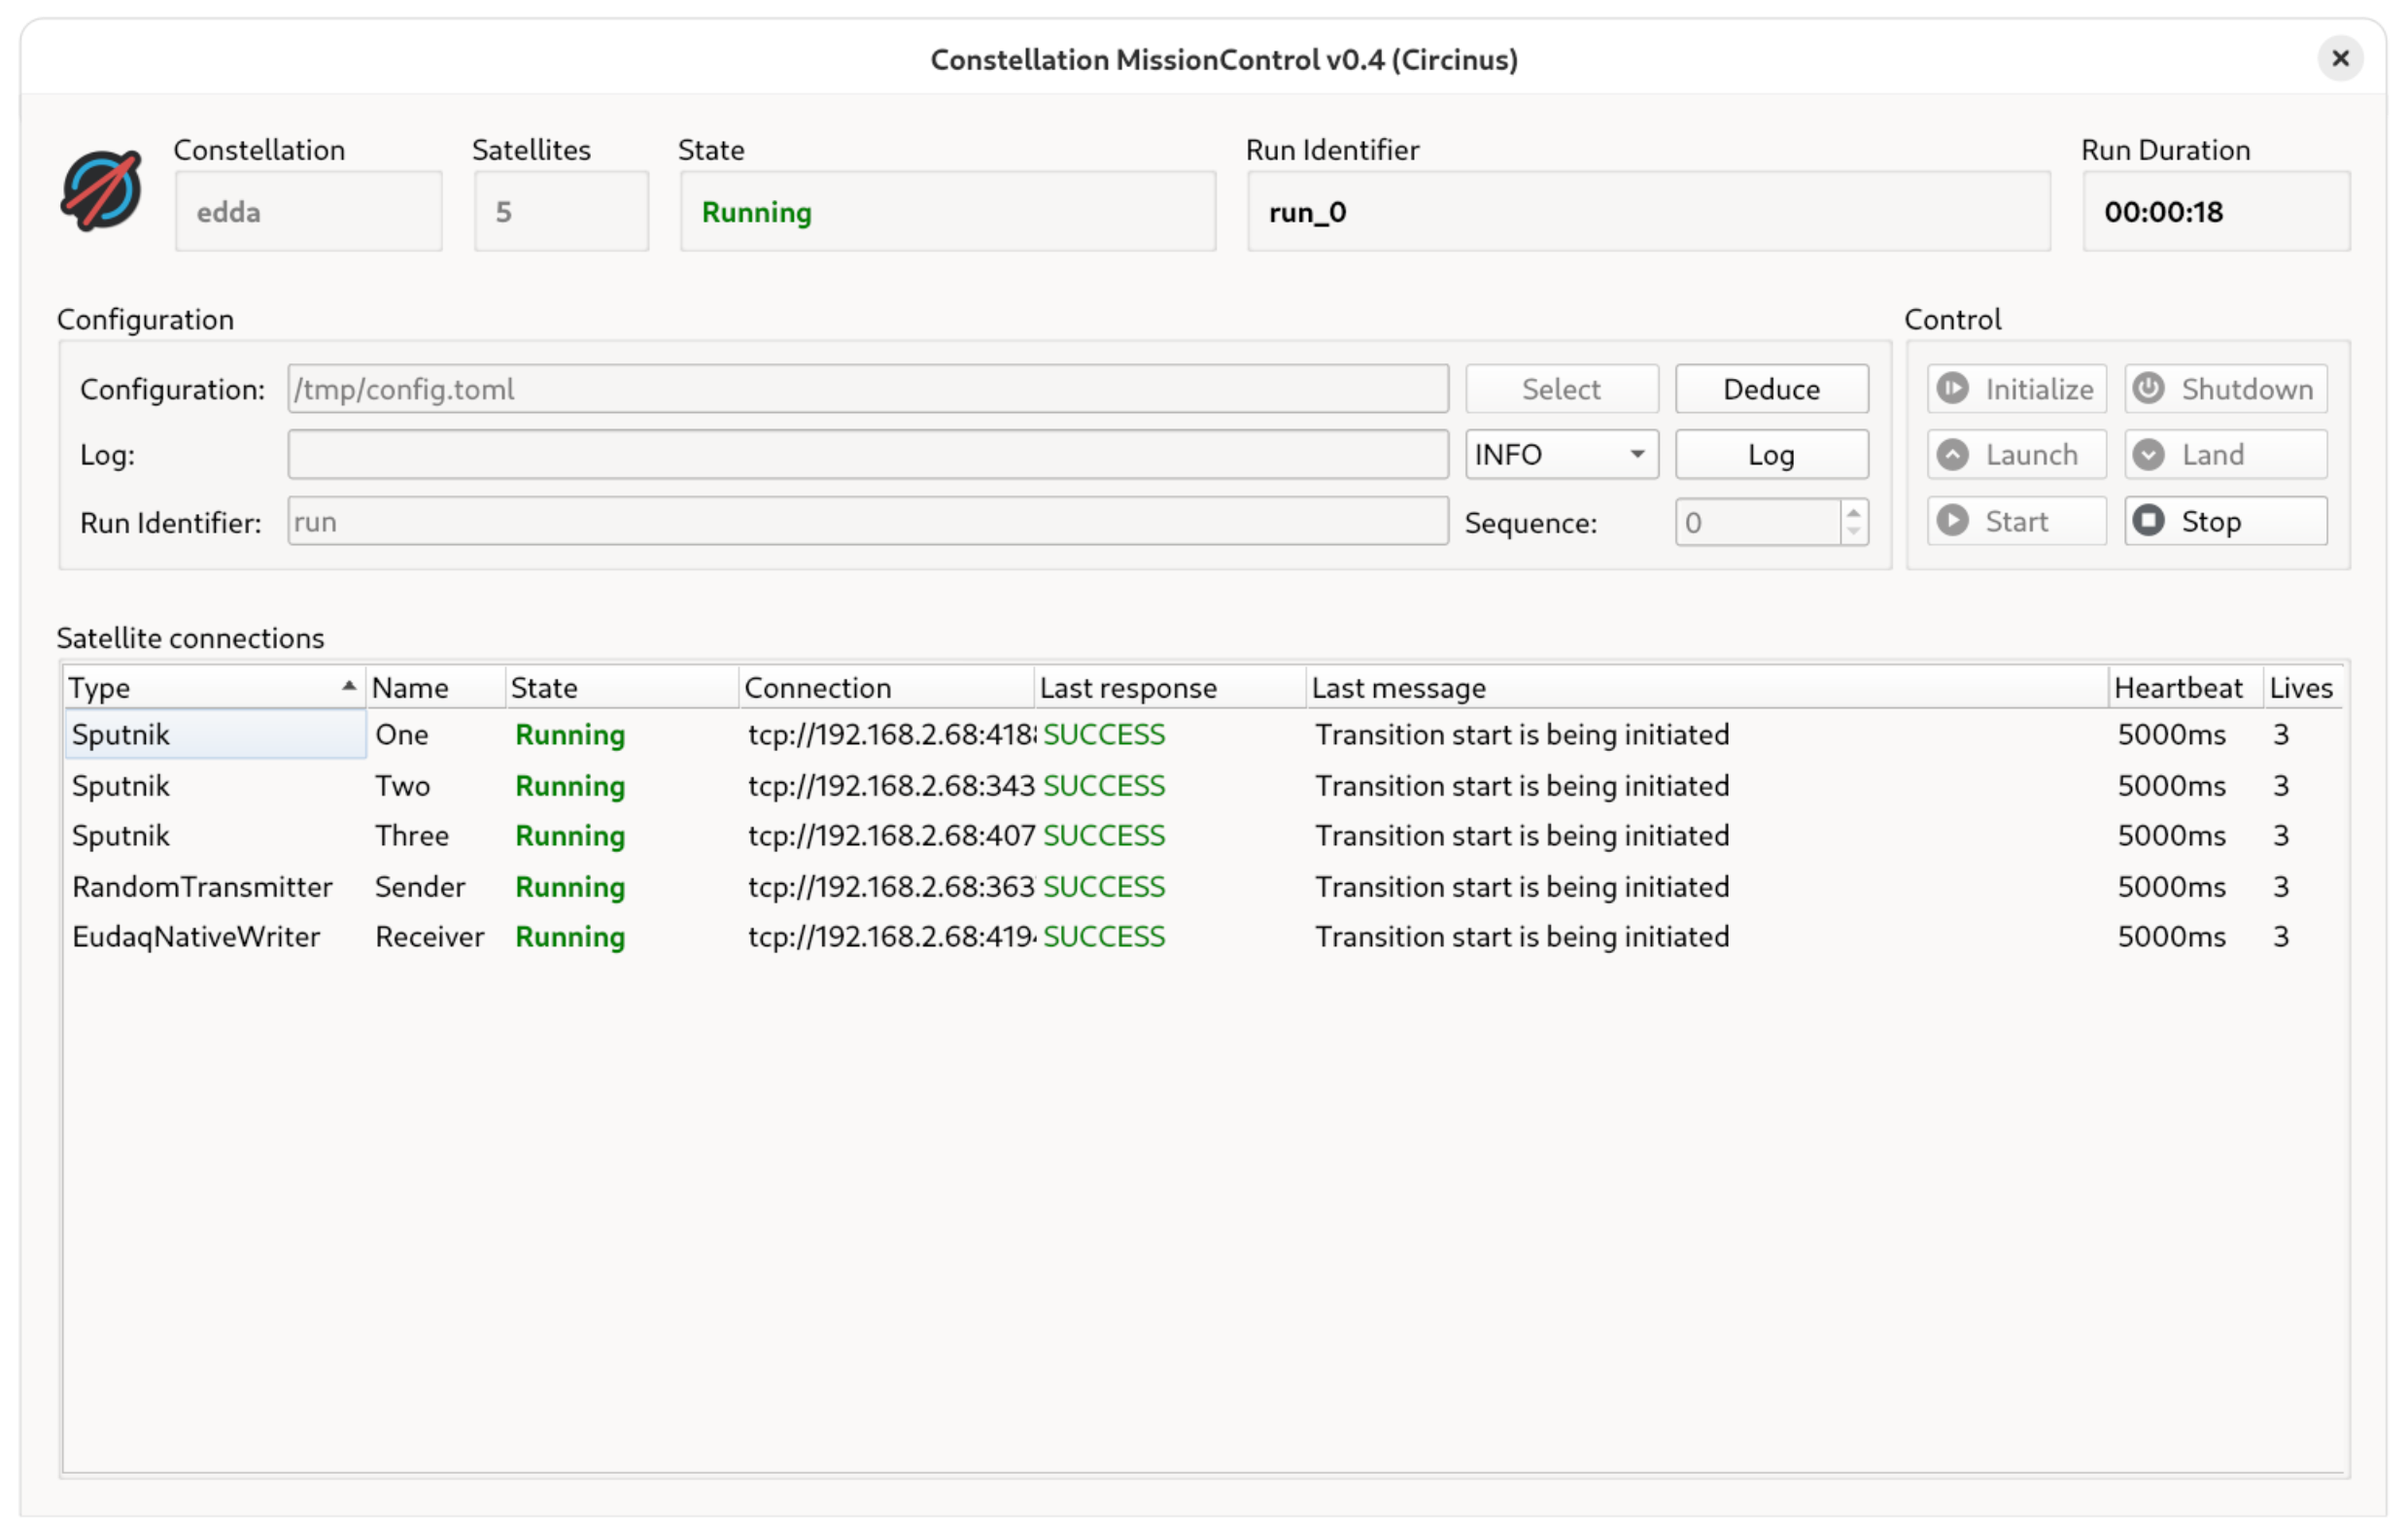
MissionControl main window in RUN state#
After a run has started, the state switches to RUN and the run duration timer in the top right starts counting the time the measurement is already running. While data is being recorded, the controller can be closed without impact on the data taking since the satellites operate autonomously. This allows closing and re-opening of user interfaces such as the controller without interrupting data taking or even taking down the entire Constellation. When the controller is restarted, the current run identifier as well as the run duration are retrieved from the Constellation automatically.
The run can be stopped by clicking the Stop button. Subsequently, the run sequence counter is incremented. To shutdown the satellites or to change the configuration, the satellites need to be returned to the INIT state, which is done by clicking the Land button.
Controlling Individual Satellites#
With MissionControl it is also possible to control satellites individually when required. Commands to individual satellites can be sent by right-clicking on the respective satellite from list, and by picking the desired command from the context menu. The menu provides access to all commands that satellite offers, and also allows to send custom commands which might not be publicly advertised by the satellite.
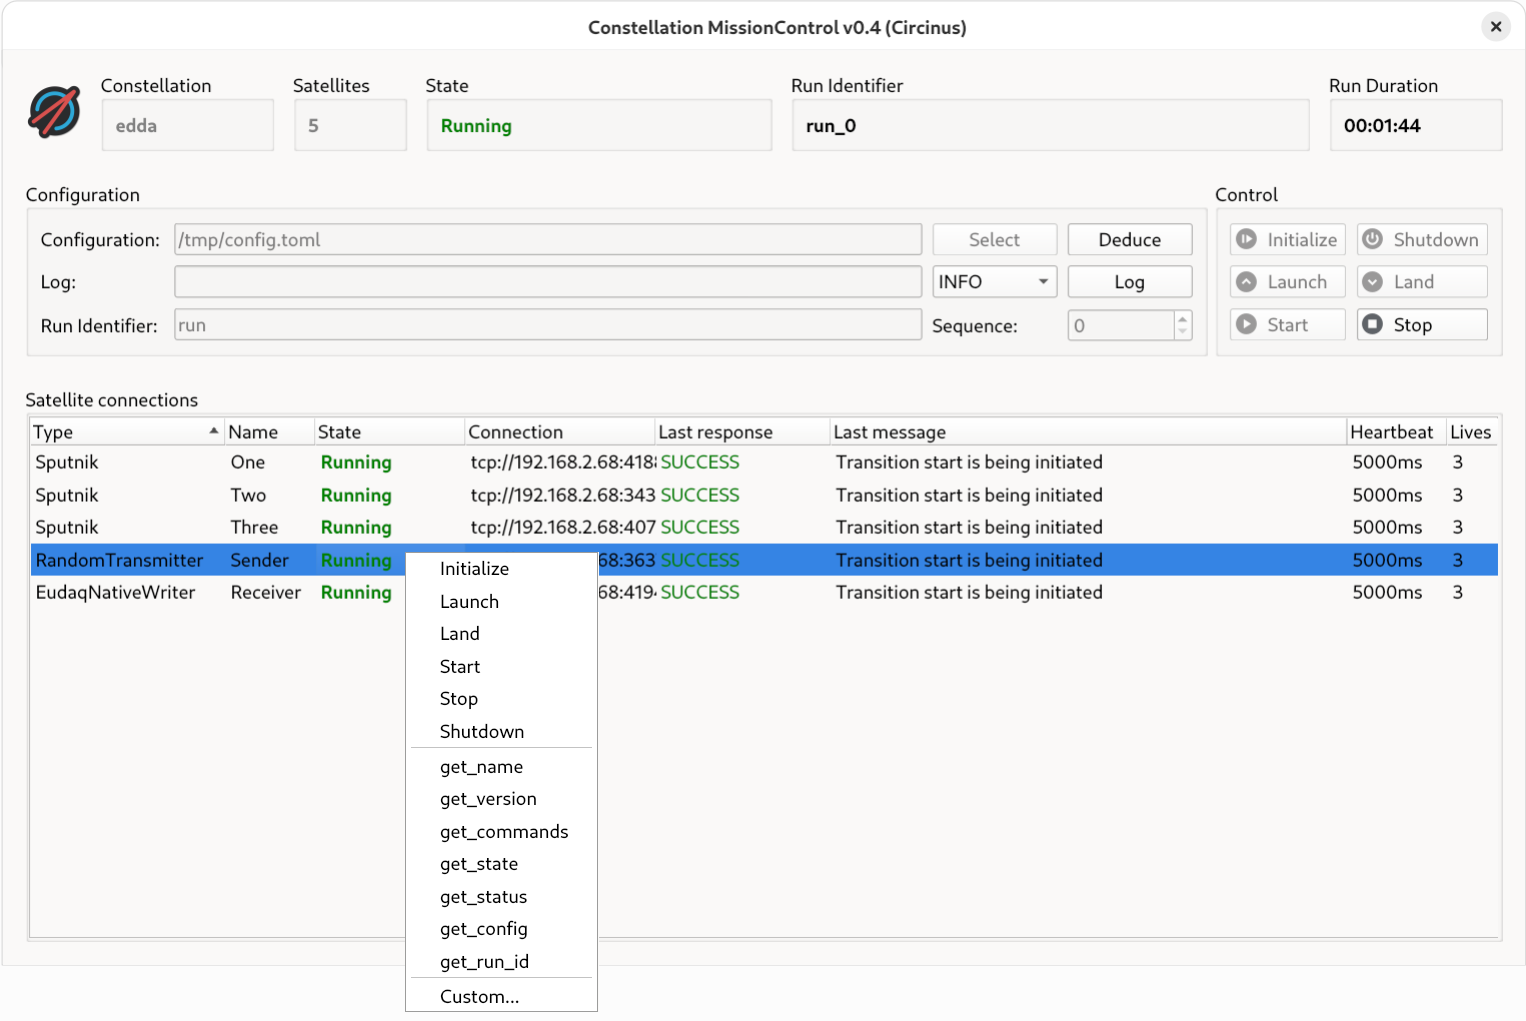
Sending a command to a single satellite#
In this tutorial, the configuration of the RandomTransmitter satellite is retrieved from the running instance.
After the command is sent, a window appears containing the “payload” of the satellite response, which in this case is a
dictionary with the configuration. A satellite might also reply with a string, which is shown in the last message column of in the satellite list.
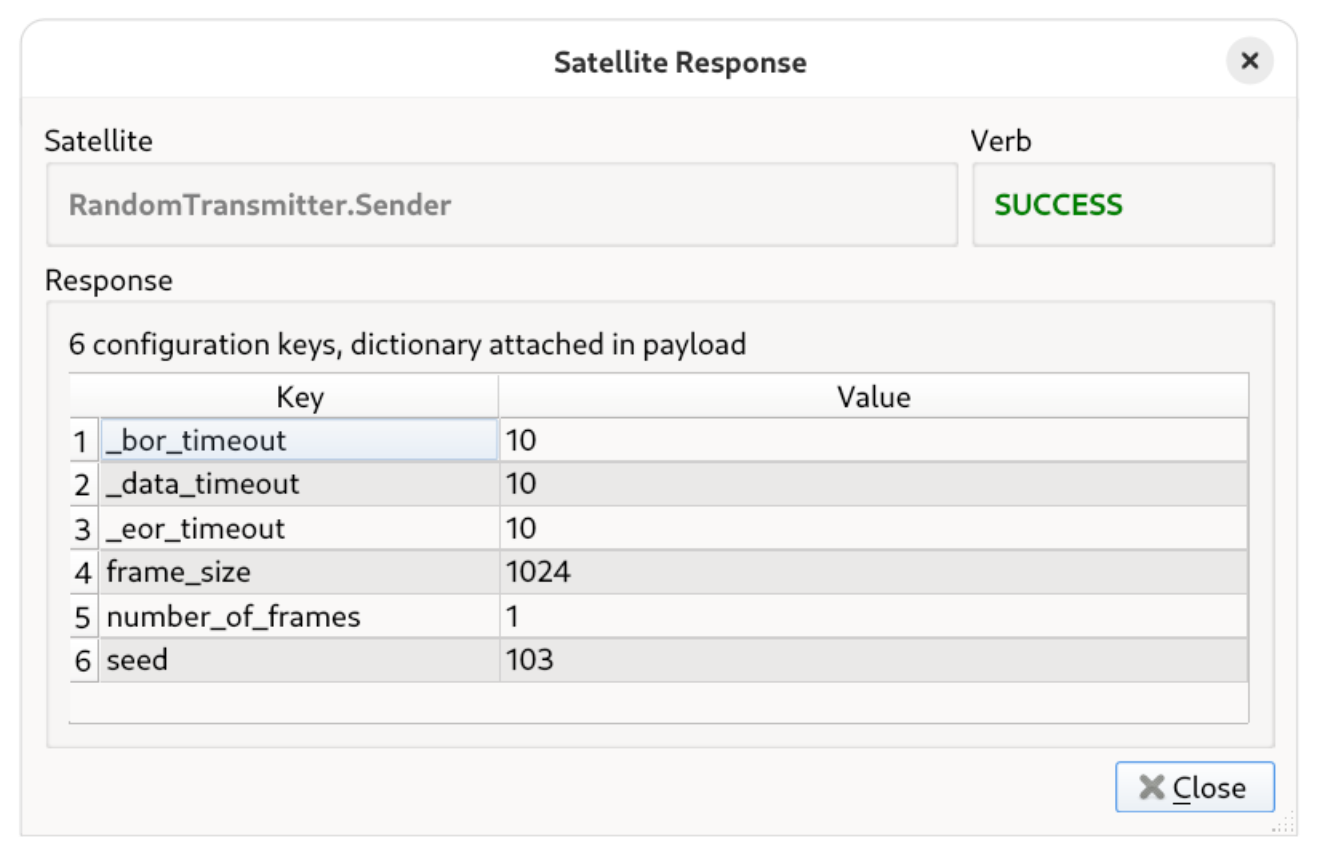
Response window of the command#
Inspecting Satellite Details#
To inspect details about a single satellite, for example its IP address, details can be shown by double-clicking on a satellite in the list. A new window opens which contains some information about its connection. It also contains a list of all available commands.
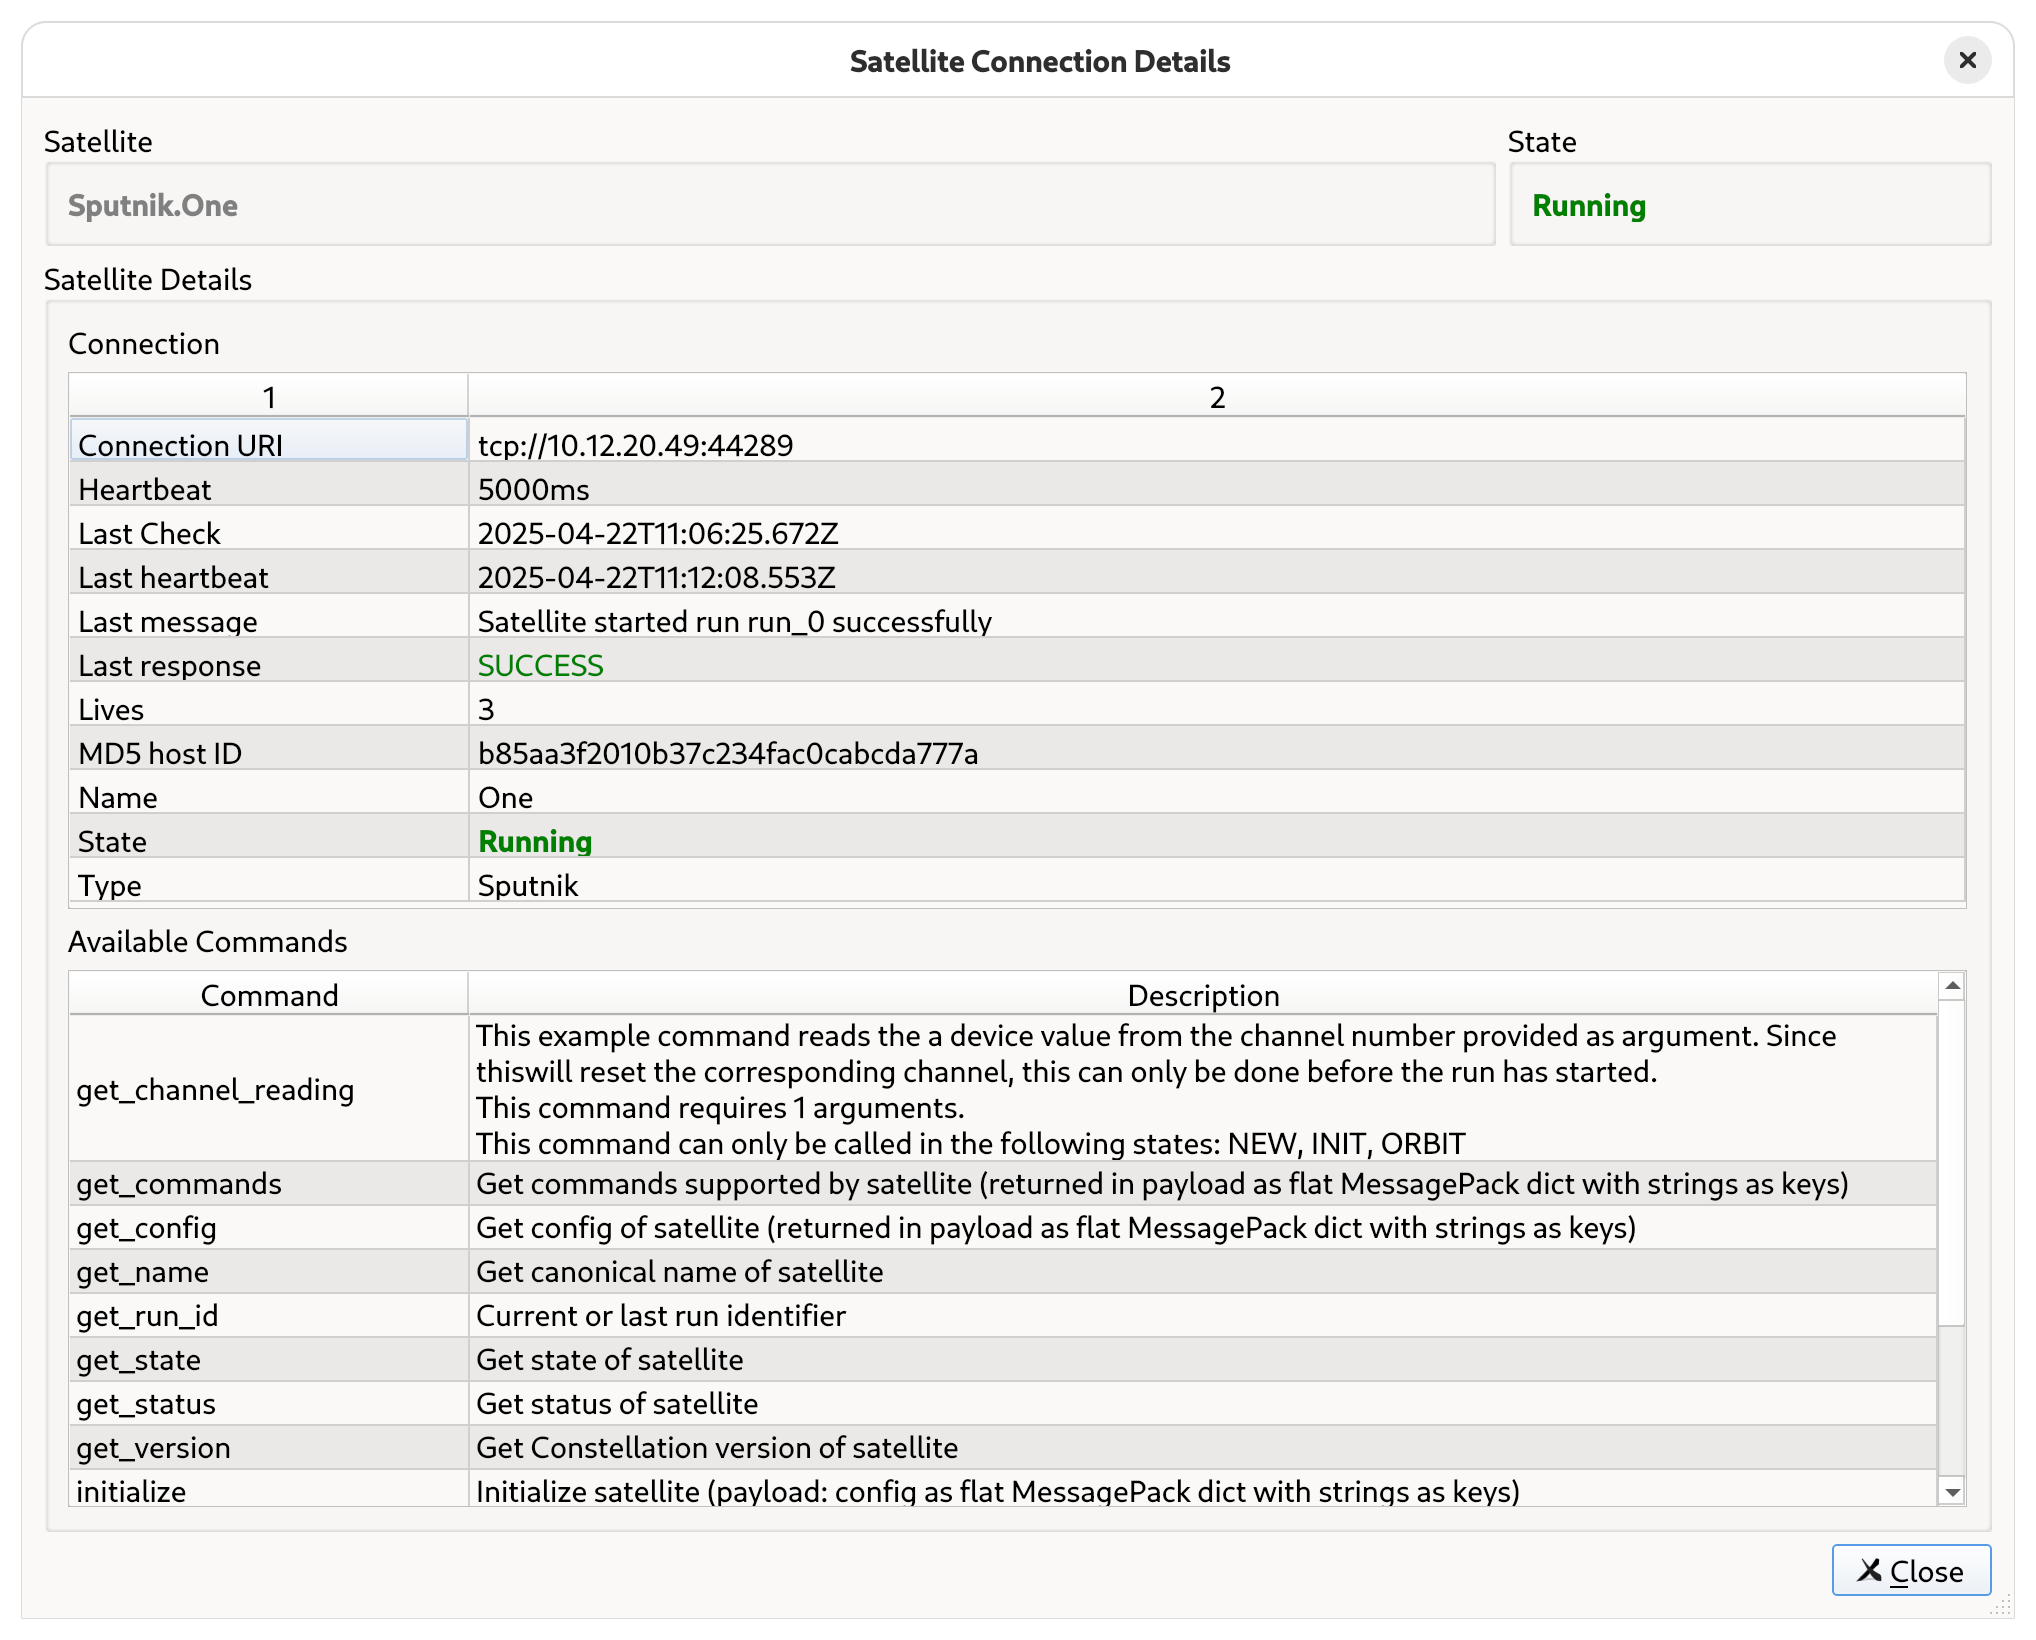
Window for connection details of a satellite#
Deducing the Configuration of the Constellation#
Satellites are operating independently of any controller, and it is possible to start multiple controllers. This allows to quickly check in on the Constellation without the need to access a specific computer. However, controllers do not necessarily have access to the same configuration file. To alleviate this problem, the configuration of all satellites can be deduced from the Constellation itself. This can be achieved by clicking the Deduce button.
For the Constellation started and configured in this tutorial, this will store a configuration file with the following content:
[_default]

[sputnik.one]
interval = 2500
launch_delay = 0

    [sputnik.one._autonomy]
    max_heartbeat_interval = 30
    role = 'DYNAMIC'

[sputnik.two]
interval = 3000
launch_delay = 0

    [sputnik.two._autonomy]
    max_heartbeat_interval = 30
    role = 'DYNAMIC'

[sputnik.three]
interval = 3000
launch_delay = 0

    [sputnik.three._autonomy]
    max_heartbeat_interval = 30
    role = 'DYNAMIC'

[randomtransmitter.sender]
block_size = 1024
number_of_blocks = 1
pregen = false
seed = 1752095125

    [randomtransmitter.sender._autonomy]
    max_heartbeat_interval = 30
    role = 'DYNAMIC'

    [randomtransmitter.sender._data]
    bor_timeout = 10
    data_timeout = 10
    eor_timeout = 10
    license = 'ODC-By-1.0'
    payload_threshold = 128
    queue_size = 32768

[eudaqnativewriter.receiver]
buffer_size = 128
flush_interval = 3
output_directory = '/tmp/test'

    [eudaqnativewriter.receiver._autonomy]
    max_heartbeat_interval = 30
    role = 'DYNAMIC'

    [eudaqnativewriter.receiver._data]
    allow_overwriting = false
    eor_timeout = 10
    receive_from = [ 'RandomTransmitter.Sender' ]
Important
This configuration contains all parameters, including parameters with default values. While giving identical results during initialization, it should not be seen as a replacement for the canonical configuration file which might be better grouped or potentially contains important comments.
